Preview is part of the native app suite pre-installed on Macs, and many forget that it’s a powerful image and PDF viewer. But it actually boasts a wide variety of functionalities, and it’s worth taking a deeper dive by exploring five of the most powerful features of this robust application.
To start, open an image with Preview and select the Markup Toolbar button at the top of the window.

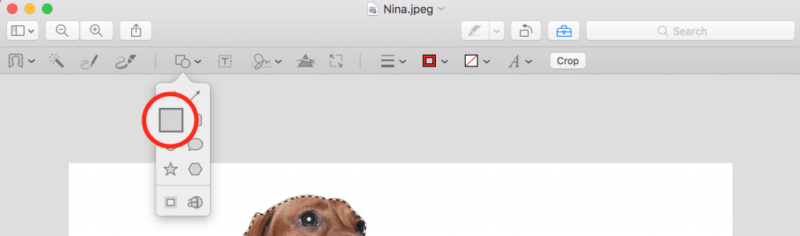
1. Use the Selection tool to shape and crop
Use the Selection tool to create a selection of the image and either crop it to that shape or duplicate a portion of it. To do this, click the Selection Tools button in the toolbar.

There are four selection options: Rectangular, Elliptical, Lasso, and Smart Lasso. The Smart Lasso will be discussed in the section below. The Lasso tool selects a portion of the image by drawing. The Rectangular and Elliptical tools select the image in those respective shapes.
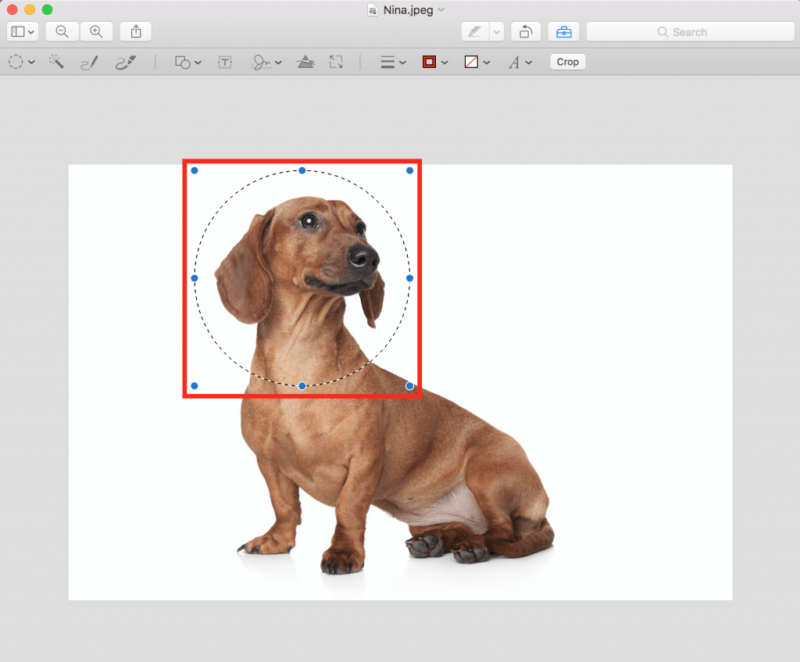
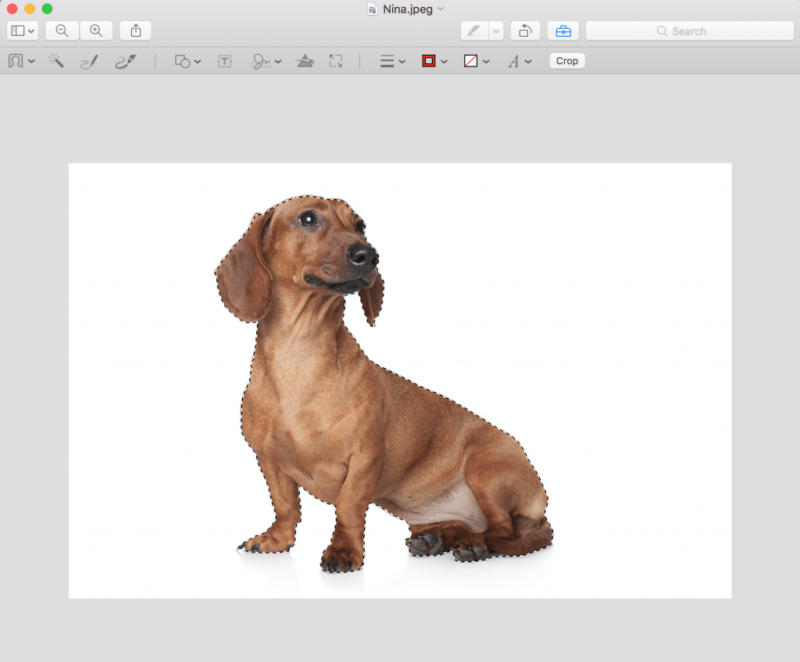
To copy the selection, press ⌘+C and then ⌘+V. Then drag the selection to wherever you desire. To crop to the selection, select the Crop button in the toolbar. Note: For Lasso or Elliptical shapes, a pop-up window will appear asking to convert the image to a PNG if the image is not already one.

2. Instant Alpha and Smart Lasso can modify the background
You can remove or modify the background of the image using either of these tools. The Instant Alpha tool removes the background of the image so long as it’s a solid color or pattern, and can be accessed via the toolbar.

Next, click and drag across the background. While dragging away from original click, the background will turn red. The red represents what will be removed.
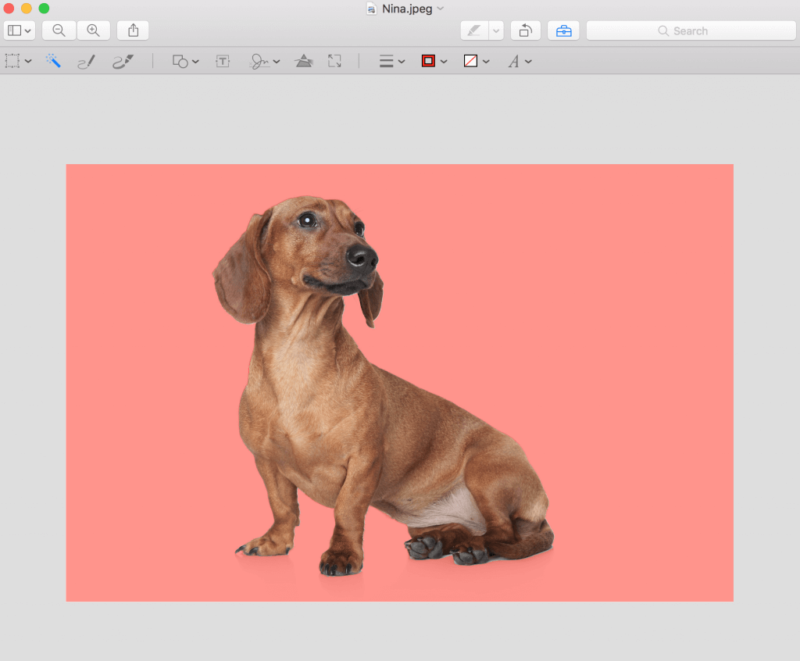
Once all of the desired section is red, release the mouse and hit Delete.

This can be done multiple times across multiple areas to remove desired background sections.
The Smart Lasso tool cuts out a portion of the image and allows for the option to change the background to a different color. To start, select the Smart Lasso tool from the Selection Tools button in the toolbar. Next, draw as precisely as possible around the object.
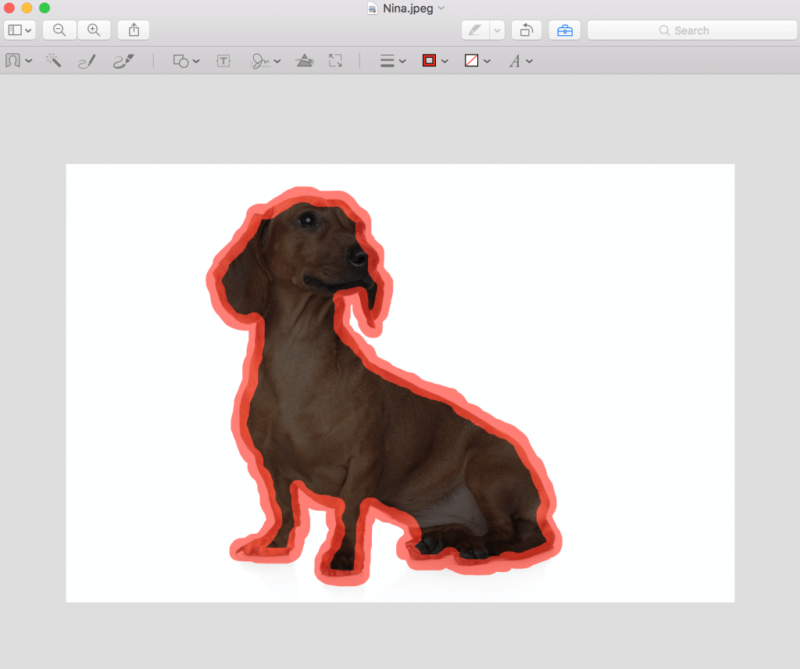
Press ⌘+C to copy the object. There will now be a copy on top of the original.
Next, select the Shapes button, followed by the square shape.
Paste the object on top of the square by pressing ⌘+V. Move the object away from the shape.
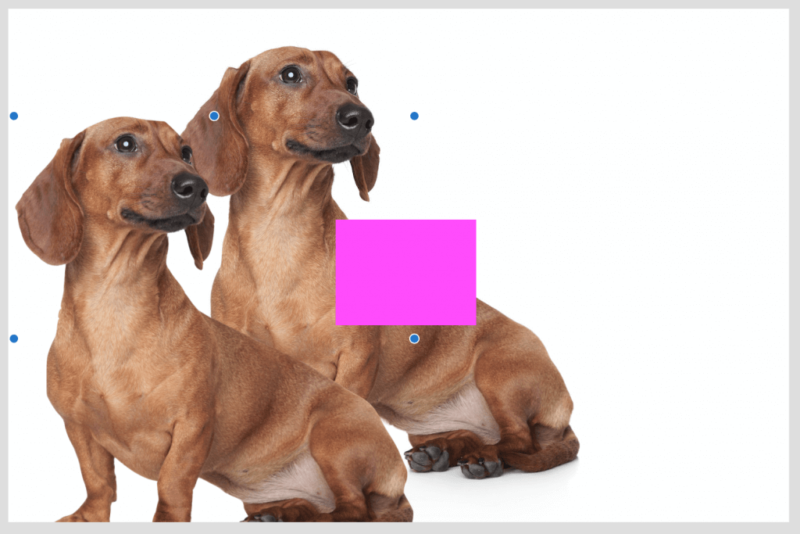
Select the square shape. Move and resize the shape to fill the image frame.
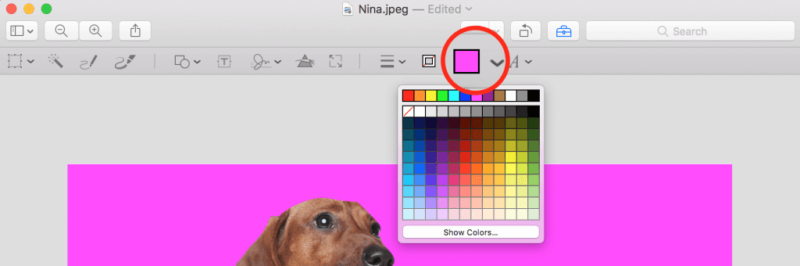
Move the object to the original position. Modify the color by selecting the Fill Color button in the toolbar. Note: It is possible to modify any shape’s border style, border color, and fill color using these buttons.
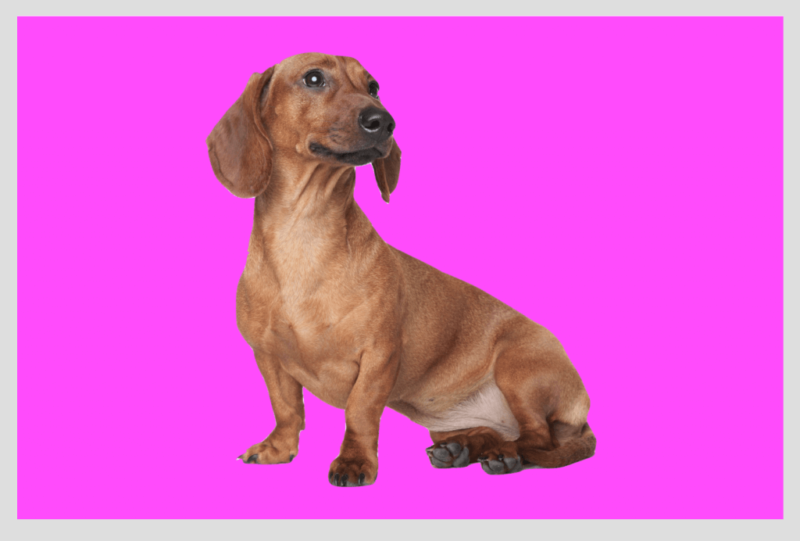
Now the object is cut out on top of a custom color!
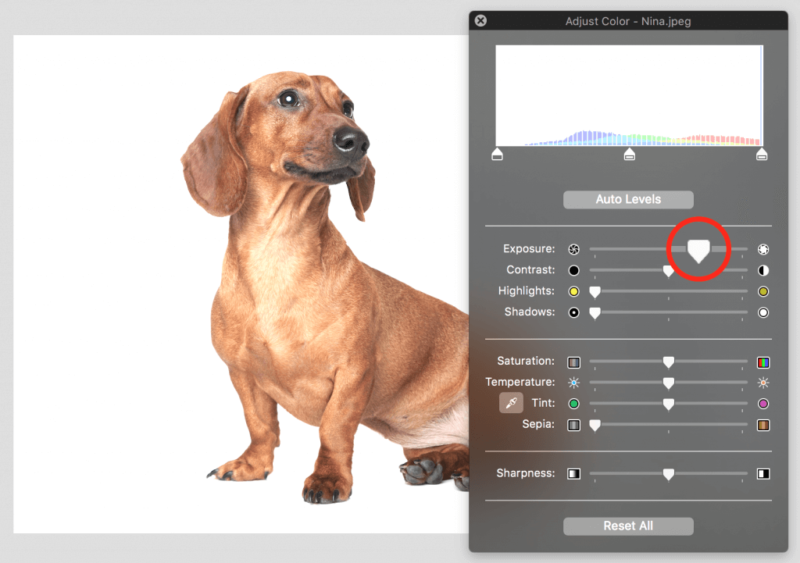
3. How to adjust color in Preview
Adjust the exposure, contrast, highlights, shadows, saturation, temperature, tint, sepia, and sharpness of images using the Adjust Color feature. Think of this as a mini-Photoshop. To modify any color elements, select the Adjust Color button.

After selecting, the adjustment window will appear. From here, adjust each image property by dragging the corresponding property sliders. While dragging, the image will live preview the adjustments.
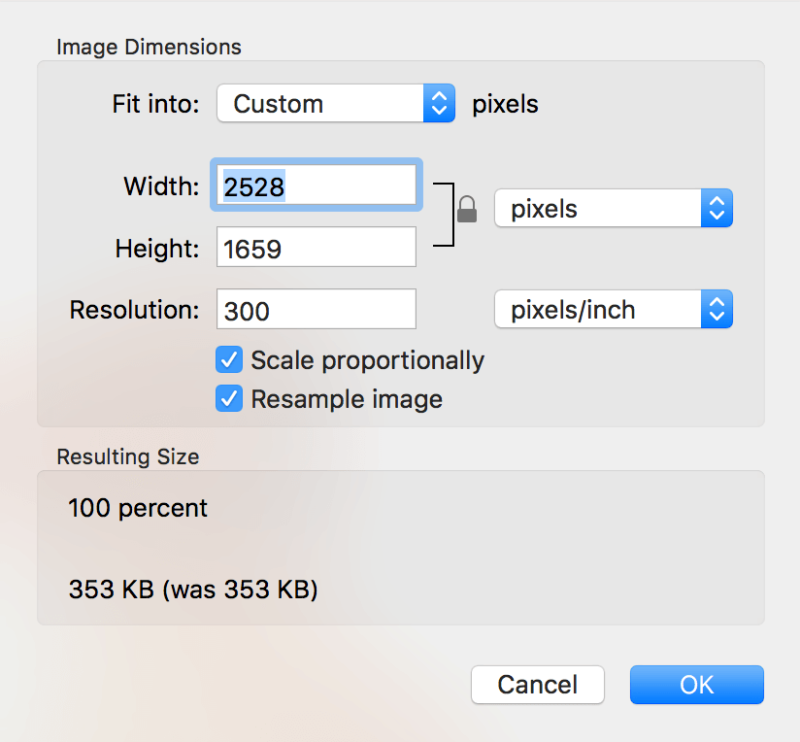
4. Exporting and adjusting image dimensions
To adjust image dimensions, use the Adjust Size button in the toolbar.

In this window, adjust the dimensions of the image in pixels, percent, inches, centimeters, millimeters, or points. One of my favorite features is the ability to see the resulting file size once dimensions are adjusted, which is helpful if a smaller file is needed.
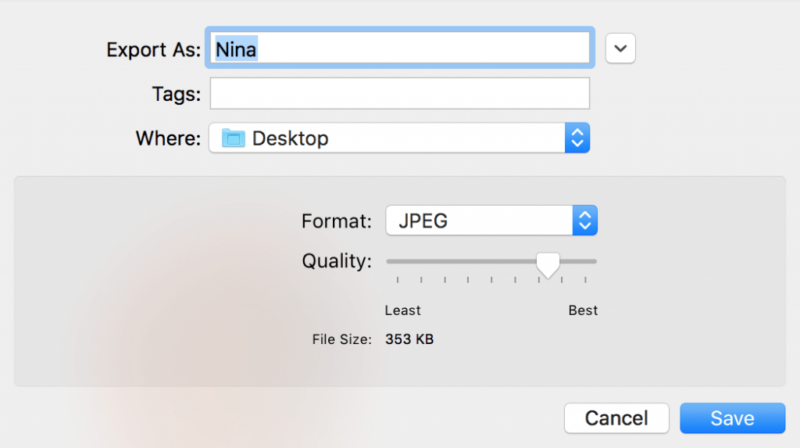
To change the file type, select the File menu and then Export.
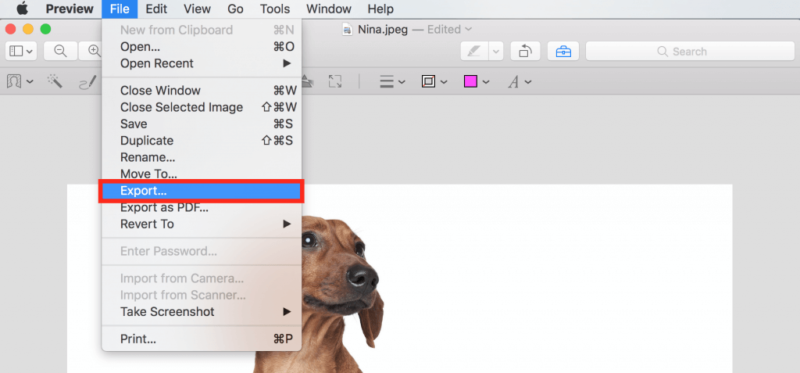
From here, select JPEG, JPEG-2000, OpenEXR, PDF, PNG, or TIFF as the new file type of the image.
5. Create a signature in Preview
Create a digital version of a signature directly in Preview that can be saved for future use. To create a signature, select the Signature button, followed by Create Signature.

There are two options to create a signature: trackpad or camera.

Using the trackpad method, draw the signature on the trackpad using a finger or stylus. Note: This method may not be as precise as the camera method. Using the built-in camera method, the signature needs to be signed on a blank white piece of paper with black ink. Next, it must be held up in front of the camera, lining it up with the blue line. Once a signature is created, it can be selected from the Signature button and then moved and resized directly in the image or PDF.

Preview is an excellent tool to perform basic edits on images and PDFs. That being said, it cannot replace the work of a professional designer. A quality graphic comes from a skilled designer and usually cannot be achieved in a consumer application like this one. However, Preview is a great starting point for any non-designer trying to achieve simple, quick edits. Happy cropping!
Related resources:
More Content

6 B2B Graphic Design Trends to Watch for in 2020
Design plays an integral role in B2B marketing, and as we’ve discussed in the past, graphic design in the B2B sphere differs in some significant ways from B2C. B2B companies and

Content Audits for Better Content Marketing
The word “audit” strikes fear in many. (Financial or tax audits are probably the first to come to mind.) To others, conducting an audit may sound dull or tedious. We

The Copywriter’s Grab Bag: Part 3
Some trilogies get better with each installment (see: Linklater’s “Before” triptych). Some trend toward the terrible (ugh, both “Mockingjay” movies and “The Matrix Revolutions”). And others, while not technically trilogies,
Leave A Comment